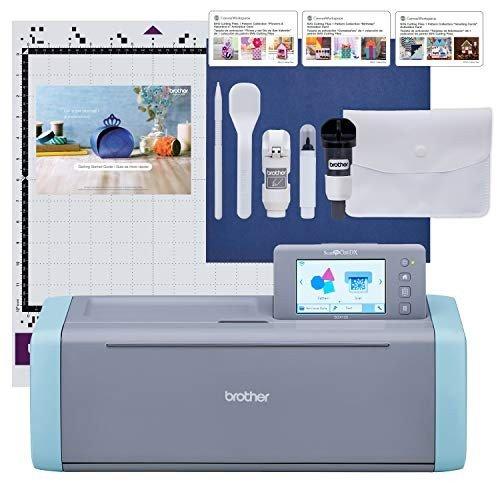
Vinyl machines are super cool if you want to create custom apparel, stickers, or any fun DIY projects. They use special sheets of vinyl, which are really easy to work with and come in all sorts of colors and finishes. Whether you're a beginner or a pro, these machines can help you bring your ideas to life.
Getting started with a vinyl machine is simple. You’ll usually find a cutting blade that slices through the vinyl with precision. Just pick your design, load the vinyl into the machine, and hit go. It cuts the shapes you want, and then you can peel away the excess vinyl, known as weeding. That’s when your design really starts to take shape!
Most vinyl machines connect to your computer or tablet, allowing you to choose from a range of designs or even create your own. Some models even come with built-in designs, so you can jump right in without any complicated software. Plus, you can experiment with different vinyl types like heat transfer vinyl for shirts or adhesive vinyl for stickers. The options are endless!
When it comes to maintenance, vinyl machines are generally low-key. Keep the blade sharp, clean the cutting mat regularly, and you’re good to go. If you're looking to up your crafting game, a vinyl machine might just be your new best buddy. They’re reliable and can produce impressive results, whether you’re making gifts, decorations, or just something fun for yourself.
How Vinyl Machines Work
Vinyl machines are pretty cool tools that let you create awesome designs for clothing, stickers, and more. They use special software and materials to cut out shapes from sheets of vinyl. The process is pretty straightforward—you just need a machine, vinyl sheets, and your design ready to go!
First, you’ll pick a design or create one yourself using design software. Once you have your design, you'll send it to the vinyl cutting machine. The machine uses a blade that moves around and cuts through the vinyl based on your design. This part is where the magic happens! The blade is super sharp and only cuts through the top layer of the vinyl, leaving the backing intact.
After the cutting is done, you’ll need to weed out the excess vinyl. This is just a fancy way of saying you’ll peel away the pieces you don’t want, which reveals your design. It can take a bit of practice to get the hang of it, but it’s strangely satisfying!
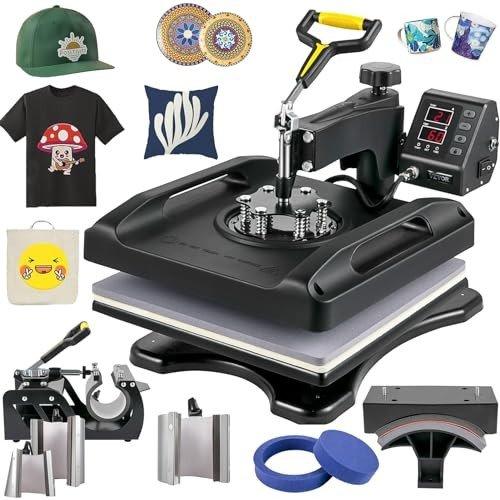
Next up is transferring your design to the actual clothing or whatever surface you’re working with. You’ll use transfer tape for this step. Just place the transfer tape over your design, press it down, and then peel it off the backing. Now you can carefully press your vinyl design onto your shirt or whatever. Make sure to apply some heat with a heat press or an iron to make it stick well. And just like that, you’ve got personalized gear!
Step by Step Usage Guide
Using a vinyl machine might seem daunting at first, but it's really straightforward once you get the hang of it. Let’s break it down into easy steps. First, make sure you have all your supplies ready: the vinyl, the cutting mat, and your design or image files.
Next, load the vinyl into the machine. If you’re using a cutting mat, place the vinyl shiny side down on the mat and then insert it into the machine. Don’t forget to adjust the settings based on the thickness of your vinyl! This is super important for getting a clean cut.
Now comes the fun part—designing! Open your software and pick out the design you want to cut. If you’re starting with a pre-made design, you can usually find plenty online. Make sure it's set to the right size for your project. Once you’re all set, hit the cut button and watch your machine work its magic!
After the cutting is done, carefully remove the vinyl from the machine and peel it off the mat. You might need to use weeding tools to get rid of the excess vinyl. Once your design is all cleaned up, apply it to your project. Use transfer tape to help place it smoothly, and make sure to press down firmly to avoid those pesky bubbles.
And that’s it! With a little practice, you’ll be creating awesome vinyl designs in no time. So grab your machine and start experimenting with different projects!
Tips for Best Results with Vinyl
Using a vinyl machine can be super fun, but a few tips can help you get the best results. First, always choose the right type of vinyl for your project. There are lots of options out there like heat transfer vinyl (HTV) for clothing or adhesive vinyl for signs and stickers. Picking the right one makes a huge difference in how your final product turns out.
Next up, make sure your surfaces are clean and smooth. This applies whether you're working with fabric or hard surfaces. Dust, dirt, or wrinkles can prevent the vinyl from sticking properly. A quick wipe-down with some rubbing alcohol can do wonders. For fabric, pre-wash it without any fabric softeners. This helps the vinyl adhere better.
Test settings on your machine before starting your full project. Every vinyl machine works a bit differently. Doing a quick test cut on a small piece can save you from wasting materials. Plus, it helps you get the right blade depth and pressure. Keeping a close watch on those settings makes your vinyl go farther.
When it’s time to weed your design, take it slow. You want to remove excess vinyl without messing up your design. A weeding tool can really help here. Push it gently around the edges, and don't rush through it. A careful approach now means a polished look later.
Lastly, heat application is key, especially for HTV. Make sure to double-check the temperature and time settings based on the vinyl type you're using. If you’re unsure, test it out on a scrap piece first. Too much heat can ruin your design, and too little won’t let it adhere. Just take your time, and you’ll be amazed at the results you can achieve!